> ## Documentation Index
> Fetch the complete documentation index at: https://docs.5x.co/llms.txt
> Use this file to discover all available pages before exploring further.
# Workflow builder
> Learn how to create visual data pipelines with triggers, tasks, and dependencies
**Focus:** Master the visual workflow builder to create automated data pipelines with triggers, tasks, and intelligent dependency management.
The 5X Jobs workflow builder provides an intuitive visual interface for creating complex data pipelines. Build workflows by connecting triggers and tasks, define execution dependencies, and configure each component to meet your specific requirements.
## Creating a new job
### **Step 1: Name your job**
Start by creating a new job and giving it a descriptive name:
1. Navigate to the **Jobs** section in your workspace
2. Click **"+ New Job"** to create a new workflow
3. Enter a descriptive name for your job in the modal dialog
4. Click **"Create job"** to proceed to the workflow builder
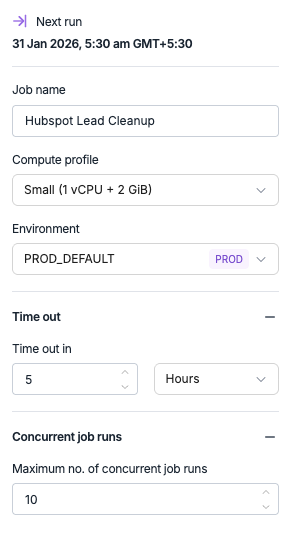
### **Step 2: Configure job settings**
Before building your workflow, configure the basic job settings:
* **Job name** - Update the job name if needed
* **Compute profile** - Select the appropriate compute resources (Small, Medium, Large)
* **Environment** - Choose the environment where this job will execute
* **Timeout settings** - Set execution time limits if needed
* **Concurrent runs** - Configure how many instances can run simultaneously
 ## Building workflows with triggers
Every job workflow starts with a trigger that determines when and how the pipeline executes.
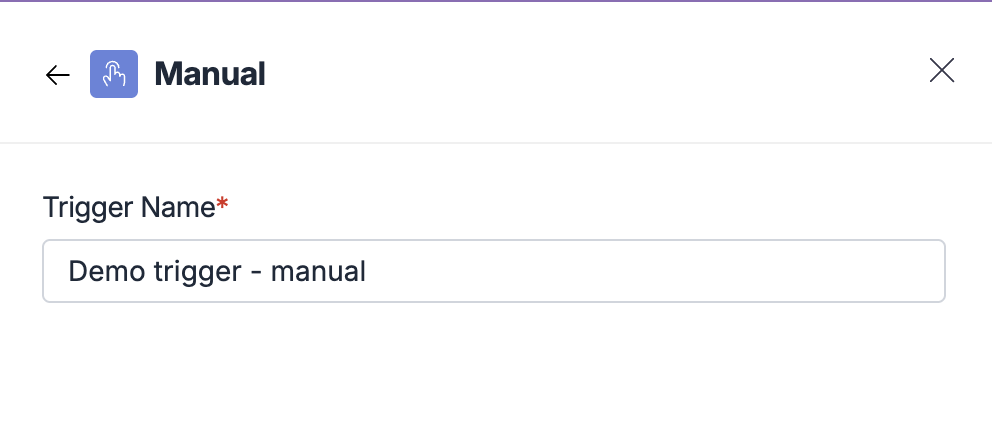
Perfect for testing, debugging, or ad-hoc execution:
1. Click **"Start the flow"** on the canvas
2. Select **"Manual"** from the trigger options
3. Configure the trigger name
4. Click to add the trigger to your workflow
## Building workflows with triggers
Every job workflow starts with a trigger that determines when and how the pipeline executes.
Perfect for testing, debugging, or ad-hoc execution:
1. Click **"Start the flow"** on the canvas
2. Select **"Manual"** from the trigger options
3. Configure the trigger name
4. Click to add the trigger to your workflow
 **Use cases:**
* Testing new workflows
* Ad-hoc data processing
* Manual data refresh
* Debugging pipeline issues
Automate execution based on time intervals:
1. Select **"Scheduled"** from the trigger options
2. Configure the trigger name
3. Choose scheduling method:
* **Custom Time** - Set intervals (every minute, hour, day, week, month)
* **CRON Expression** - Use advanced scheduling syntax
4. Set the execution time and timezone
**Use cases:**
* Testing new workflows
* Ad-hoc data processing
* Manual data refresh
* Debugging pipeline issues
Automate execution based on time intervals:
1. Select **"Scheduled"** from the trigger options
2. Configure the trigger name
3. Choose scheduling method:
* **Custom Time** - Set intervals (every minute, hour, day, week, month)
* **CRON Expression** - Use advanced scheduling syntax
4. Set the execution time and timezone
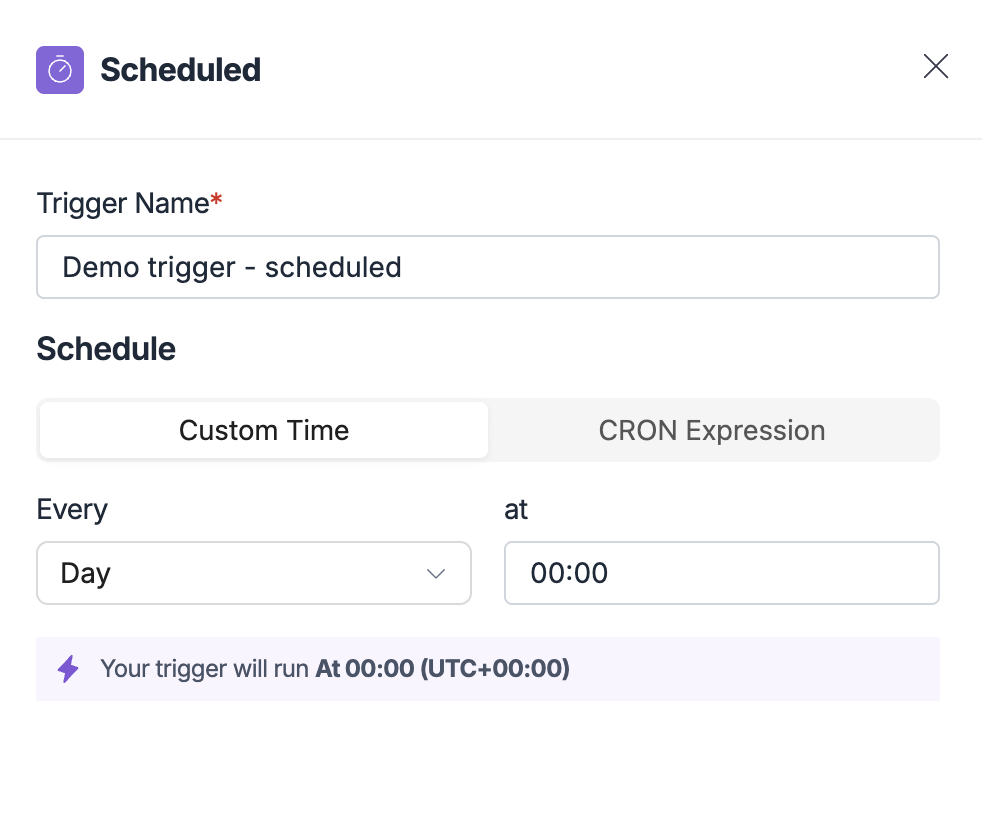 **Scheduling options:**
* **Frequency** - Every minute, hour, day, week, or month
* **Time** - Specific time of day for execution
* **Timezone** - Automatic UTC handling with local time display
* **CRON** - Advanced scheduling for complex patterns
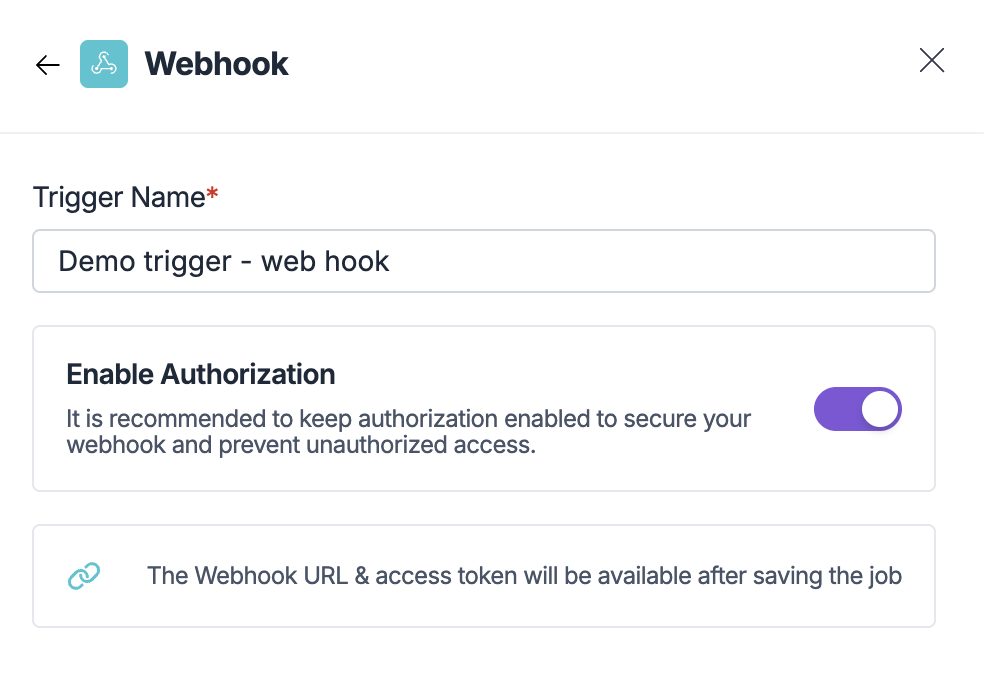
Enable event-driven execution from external systems:
1. Select **"Webhook"** from the trigger options
2. Configure the trigger name
3. Enable authorization (recommended for security)
4. Save to generate webhook URL and access token
**Scheduling options:**
* **Frequency** - Every minute, hour, day, week, or month
* **Time** - Specific time of day for execution
* **Timezone** - Automatic UTC handling with local time display
* **CRON** - Advanced scheduling for complex patterns
Enable event-driven execution from external systems:
1. Select **"Webhook"** from the trigger options
2. Configure the trigger name
3. Enable authorization (recommended for security)
4. Save to generate webhook URL and access token
 **Features:**
* **Secure authentication** - Configurable access tokens
* **Real-time execution** - Immediate pipeline activation
* **External integration** - Connect with any system that can send HTTP requests
Integrate with GitHub for CI/CD workflows:
1. Select **"Pull Request"** from the trigger options
2. Configure the trigger name
3. Select the GitHub repository
4. Optionally enable **"Run on draft pull request"**
5. Note the access token requirements
**Features:**
* **Secure authentication** - Configurable access tokens
* **Real-time execution** - Immediate pipeline activation
* **External integration** - Connect with any system that can send HTTP requests
Integrate with GitHub for CI/CD workflows:
1. Select **"Pull Request"** from the trigger options
2. Configure the trigger name
3. Select the GitHub repository
4. Optionally enable **"Run on draft pull request"**
5. Note the access token requirements
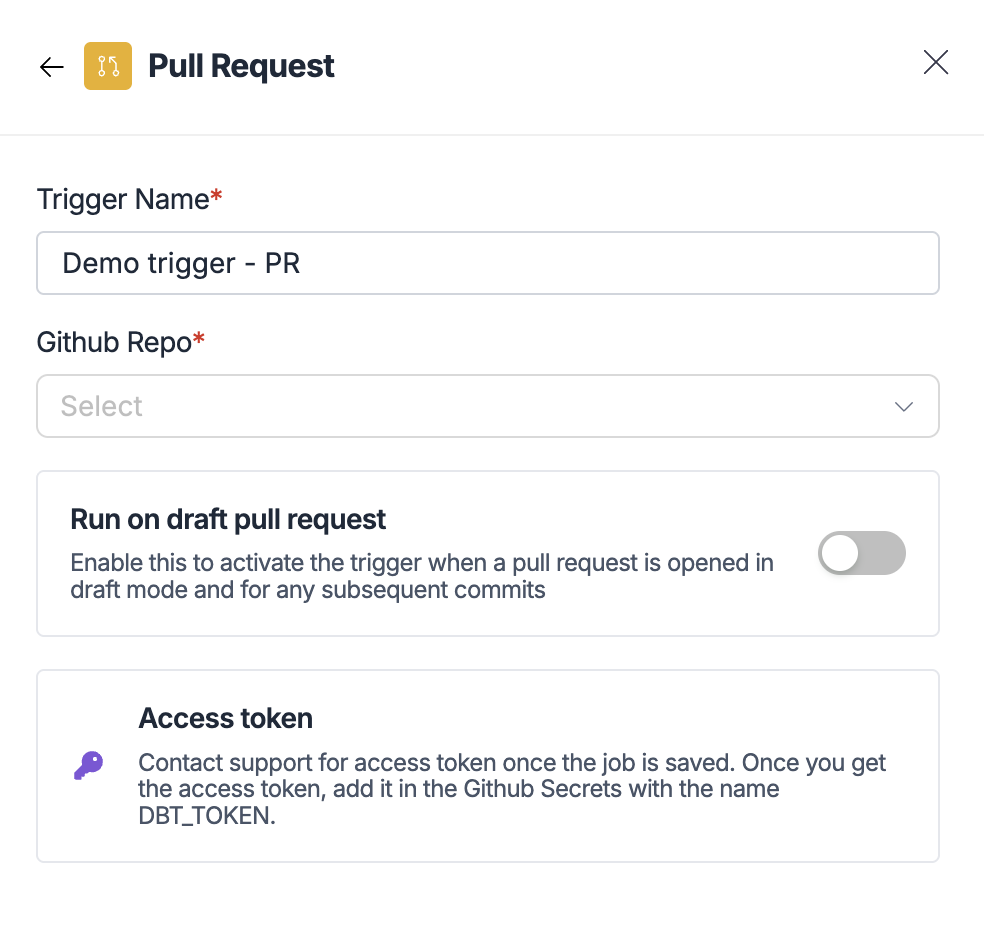 **Requirements:**
* GitHub repository access
* Contact 5X support for access token
* Configure `DBT_TOKEN` in GitHub Secrets
## Adding tasks to your workflow
Once you have a trigger, add tasks to define what work your pipeline performs.
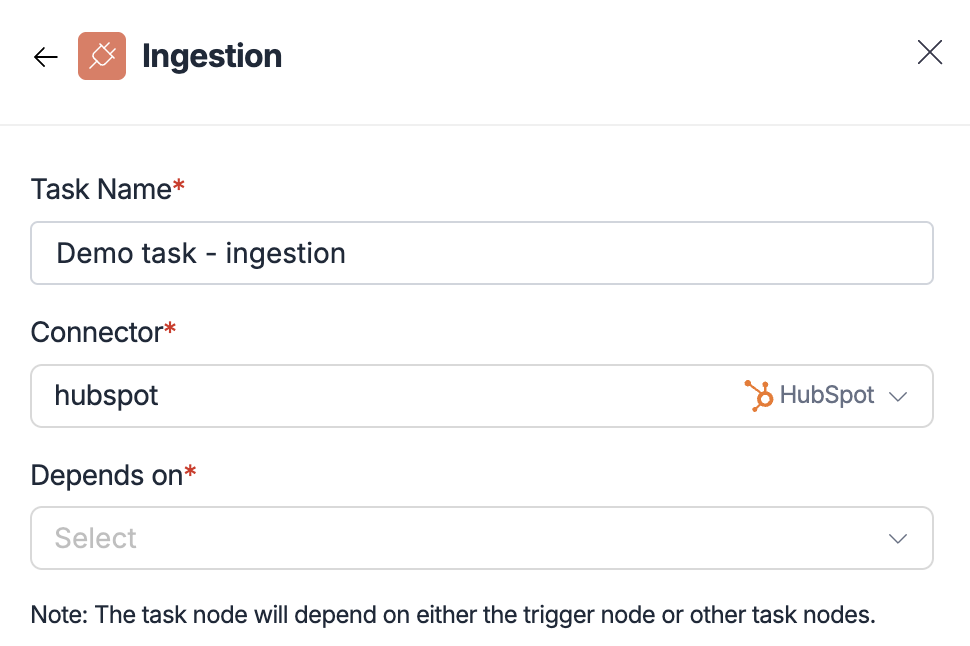
Use existing connectors to bring data into your warehouse:
1. Click the **"+"** button after your trigger
2. Select **"Ingestion"** from the task options
3. Configure the task:
* **Task name** - Descriptive name for this ingestion step
* **Connector** - Select from 600+ available connectors
* **Depends on** - Choose trigger or previous tasks
**Requirements:**
* GitHub repository access
* Contact 5X support for access token
* Configure `DBT_TOKEN` in GitHub Secrets
## Adding tasks to your workflow
Once you have a trigger, add tasks to define what work your pipeline performs.
Use existing connectors to bring data into your warehouse:
1. Click the **"+"** button after your trigger
2. Select **"Ingestion"** from the task options
3. Configure the task:
* **Task name** - Descriptive name for this ingestion step
* **Connector** - Select from 600+ available connectors
* **Depends on** - Choose trigger or previous tasks
 **Integration benefits:**
* Same connectors as 5X Ingestion
* Automatic dependency management
* Seamless data flow between pipeline steps
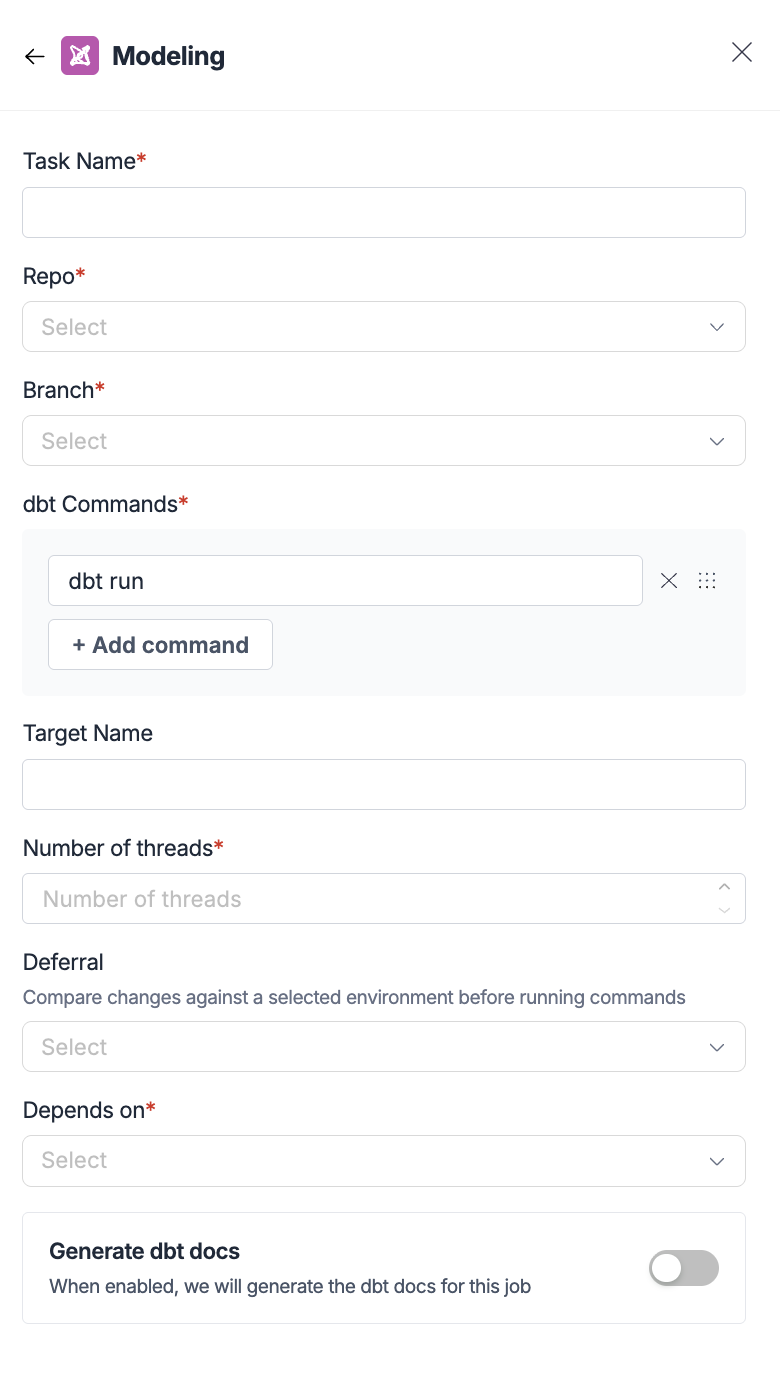
Execute dbt transformations and models:
1. Select **"Modeling"** from the task options
2. Configure the modeling task:
* **Task name** - Name for this modeling step
* **Repository** - GitHub repository containing dbt project
* **Branch** - Specific branch to use
* **Depends on** - Choose trigger or previous tasks
* **dbt commands** - Commands to execute (default: `dbt run`)
* **Target name** - dbt target environment
* **Number of threads** - Parallel execution threads
* **Deferral** - Compare against another environment
* **Generate dbt docs** - Automatically create documentation
**Integration benefits:**
* Same connectors as 5X Ingestion
* Automatic dependency management
* Seamless data flow between pipeline steps
Execute dbt transformations and models:
1. Select **"Modeling"** from the task options
2. Configure the modeling task:
* **Task name** - Name for this modeling step
* **Repository** - GitHub repository containing dbt project
* **Branch** - Specific branch to use
* **Depends on** - Choose trigger or previous tasks
* **dbt commands** - Commands to execute (default: `dbt run`)
* **Target name** - dbt target environment
* **Number of threads** - Parallel execution threads
* **Deferral** - Compare against another environment
* **Generate dbt docs** - Automatically create documentation
 **dbt integration features:**
* Multiple dbt versions supported (1.6.18, 1.7.19, 1.8.9, 1.9.10)
* Custom command execution
* Environment-specific targeting
* Documentation generation
* Deferral for change comparison
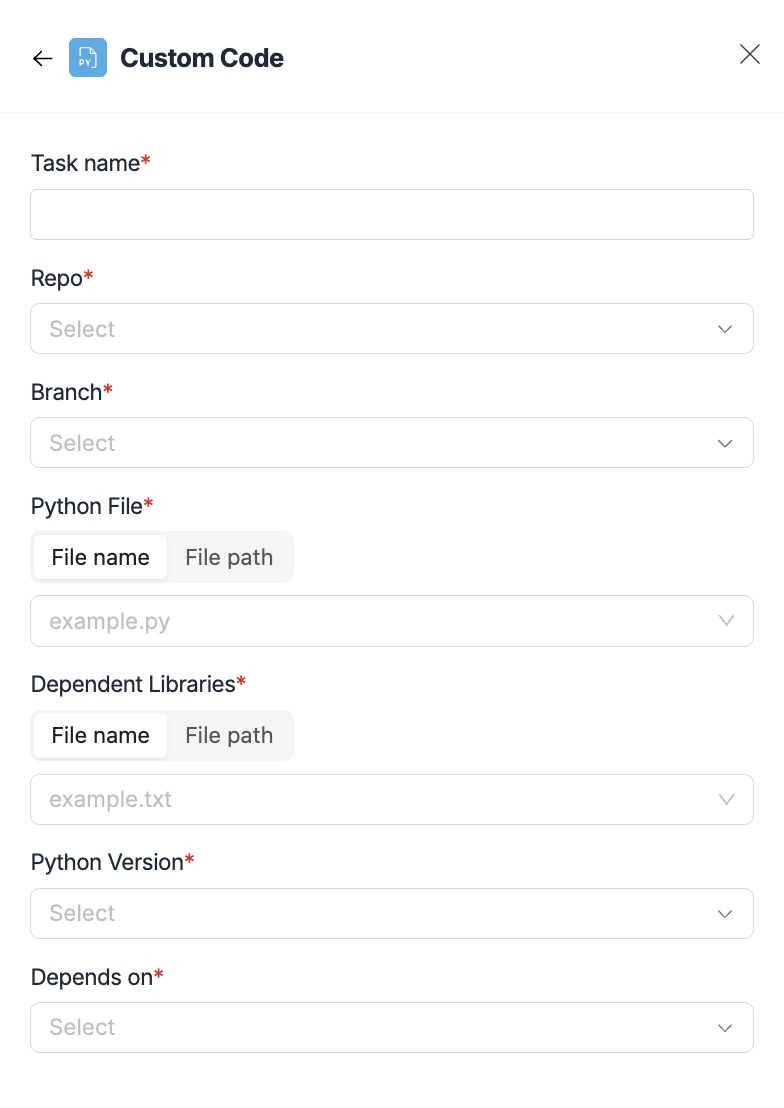
Execute Python scripts and applications:
1. Select **"Custom Code"** from the task options
2. Configure the Python task:
* **Task name** - Name for this code execution
* **Repository** - GitHub repository with Python code
* **Branch** - Specific branch to use
* **Python file** - Main script to execute (by name or path)
* **Dependent libraries** - Requirements file (by name or path)
* **Python version** - Select from supported versions (3.8.19 - 3.12.4)
* **Depends on** - Previous tasks or triggers
**dbt integration features:**
* Multiple dbt versions supported (1.6.18, 1.7.19, 1.8.9, 1.9.10)
* Custom command execution
* Environment-specific targeting
* Documentation generation
* Deferral for change comparison
Execute Python scripts and applications:
1. Select **"Custom Code"** from the task options
2. Configure the Python task:
* **Task name** - Name for this code execution
* **Repository** - GitHub repository with Python code
* **Branch** - Specific branch to use
* **Python file** - Main script to execute (by name or path)
* **Dependent libraries** - Requirements file (by name or path)
* **Python version** - Select from supported versions (3.8.19 - 3.12.4)
* **Depends on** - Previous tasks or triggers
 **Python execution features:**
* Multiple Python versions (3.8.19, 3.9.19, 3.10.14, 3.11.9, 3.12.4)
* Dependency management with requirements files
* Environment variable injection
* Secret management for sensitive data
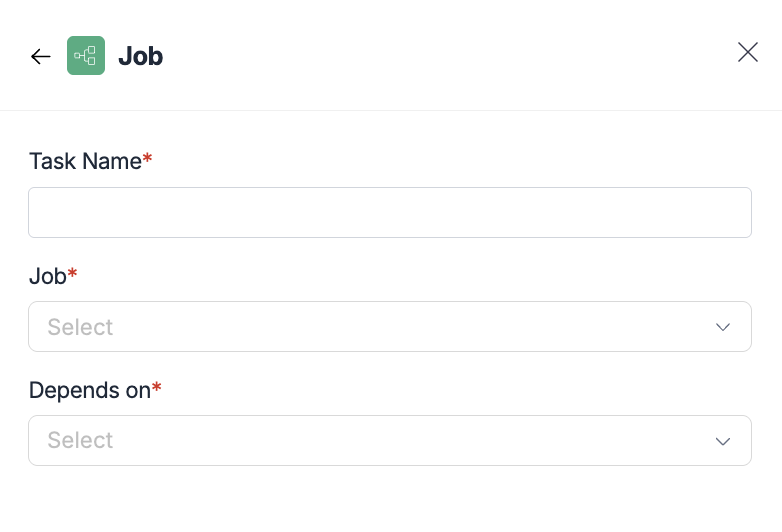
Execute other jobs as sub-workflows:
1. Select **"Job"** from the task options
2. Configure the job task:
* **Task name** - Name for this sub-job execution
* **Job** - Select another job from your workspace
* **Depends on** - Previous tasks or triggers
**Python execution features:**
* Multiple Python versions (3.8.19, 3.9.19, 3.10.14, 3.11.9, 3.12.4)
* Dependency management with requirements files
* Environment variable injection
* Secret management for sensitive data
Execute other jobs as sub-workflows:
1. Select **"Job"** from the task options
2. Configure the job task:
* **Task name** - Name for this sub-job execution
* **Job** - Select another job from your workspace
* **Depends on** - Previous tasks or triggers
 **Parallel execution benefits:**
* Reuse existing job definitions
* Create hierarchical workflows
* Enable complex orchestration patterns
* Modular pipeline design
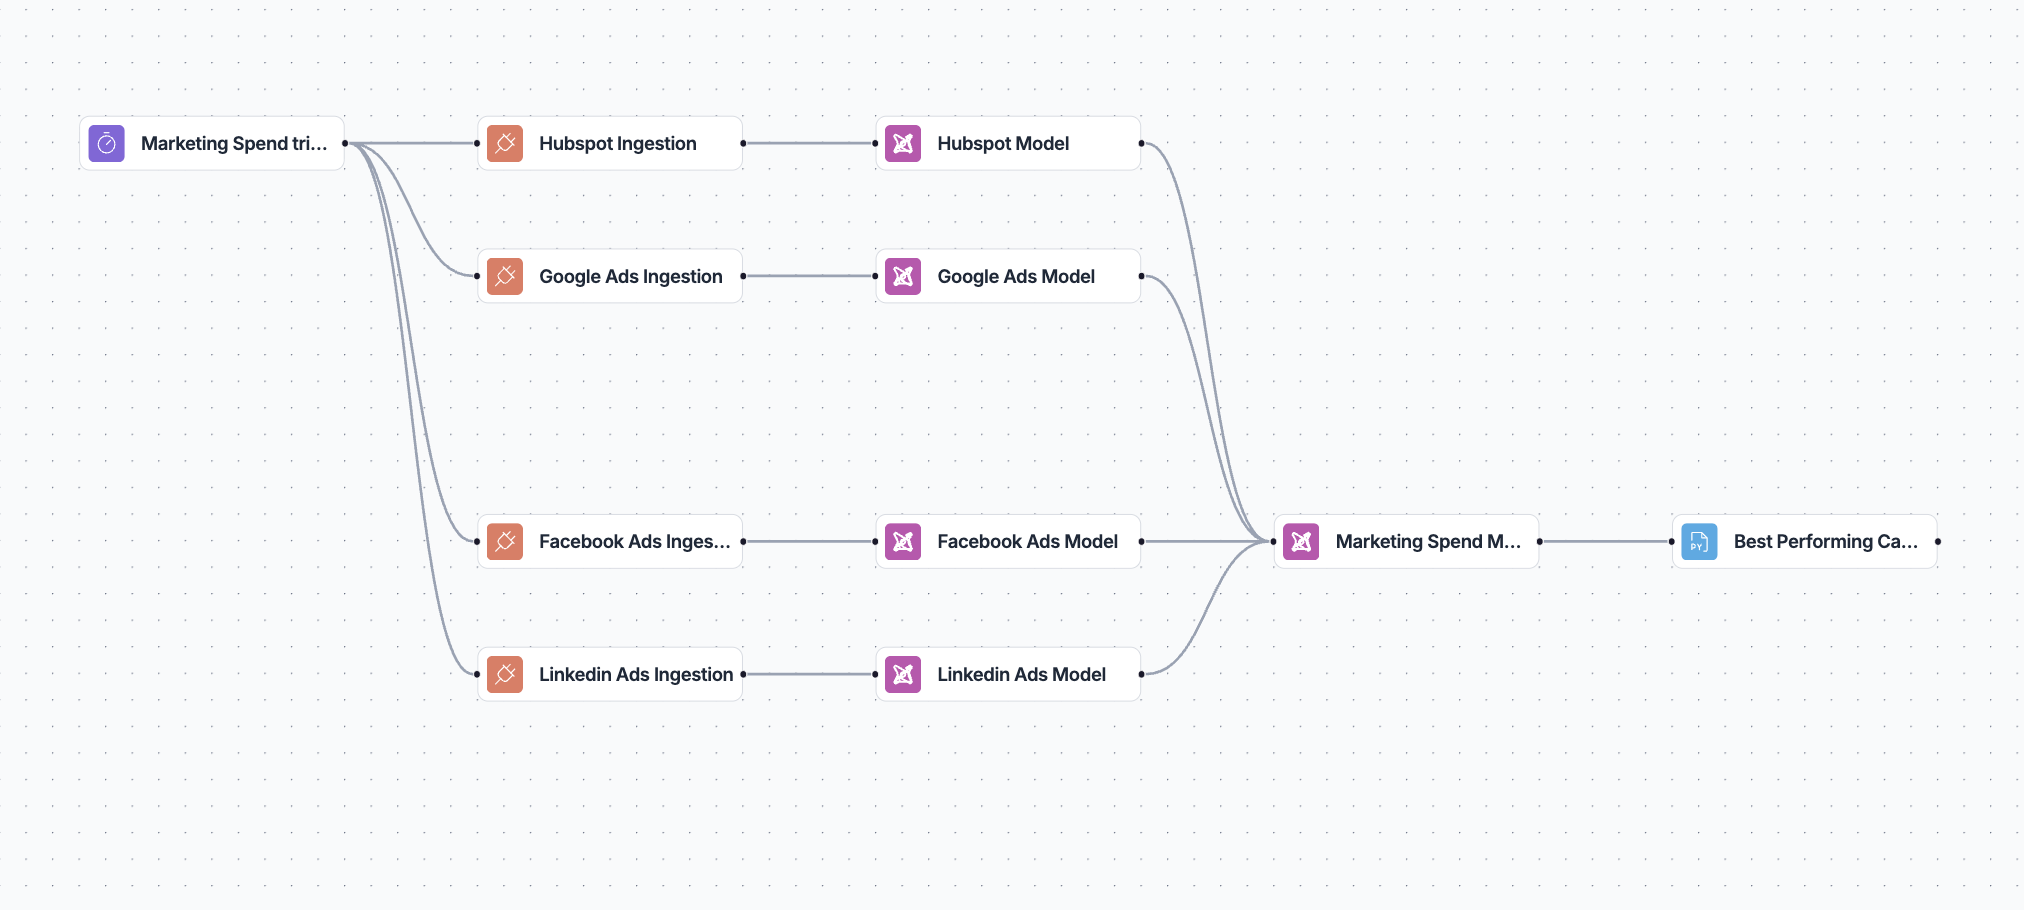
## Managing dependencies and flow
### **Visual dependency management**
The workflow builder automatically handles task dependencies:
* **Sequential execution** - Tasks run in order based on connections
* **Parallel execution** - Tasks without dependencies run simultaneously
* **Conditional flow** - Complex branching based on task outcomes
* **Error handling** - Failed tasks stop dependent execution
**Parallel execution benefits:**
* Reuse existing job definitions
* Create hierarchical workflows
* Enable complex orchestration patterns
* Modular pipeline design
## Managing dependencies and flow
### **Visual dependency management**
The workflow builder automatically handles task dependencies:
* **Sequential execution** - Tasks run in order based on connections
* **Parallel execution** - Tasks without dependencies run simultaneously
* **Conditional flow** - Complex branching based on task outcomes
* **Error handling** - Failed tasks stop dependent execution
 ### **Best practices for workflow design**
**Start simple:**
* Begin with basic triggers and single tasks
* Test each component before adding complexity
* Use manual triggers for initial development
**Design for reliability:**
* Add appropriate timeout settings
* Configure concurrent run limits
* Plan for error scenarios and retries
**Optimize for performance:**
* Use parallel execution where possible
* Select appropriate compute profiles
* Minimize unnecessary dependencies
**Maintain clarity:**
* Use descriptive names for triggers and tasks
* Document complex workflows
* Keep workflows focused on specific business processes
## Publishing and testing workflows
### **Draft vs Live versions**
5X Jobs supports draft development with live execution:
* **Draft changes** - Develop and modify workflows without affecting production. Test changes thoroughly before publishing!
* **Live execution** - Only published workflows execute on schedule
### **Publishing workflows**
1. Complete your workflow configuration
2. Review all settings and dependencies
3. Click **"Publish"** to make changes live
4. Monitor the first execution to ensure proper operation
***
### **Best practices for workflow design**
**Start simple:**
* Begin with basic triggers and single tasks
* Test each component before adding complexity
* Use manual triggers for initial development
**Design for reliability:**
* Add appropriate timeout settings
* Configure concurrent run limits
* Plan for error scenarios and retries
**Optimize for performance:**
* Use parallel execution where possible
* Select appropriate compute profiles
* Minimize unnecessary dependencies
**Maintain clarity:**
* Use descriptive names for triggers and tasks
* Document complex workflows
* Keep workflows focused on specific business processes
## Publishing and testing workflows
### **Draft vs Live versions**
5X Jobs supports draft development with live execution:
* **Draft changes** - Develop and modify workflows without affecting production. Test changes thoroughly before publishing!
* **Live execution** - Only published workflows execute on schedule
### **Publishing workflows**
1. Complete your workflow configuration
2. Review all settings and dependencies
3. Click **"Publish"** to make changes live
4. Monitor the first execution to ensure proper operation
***