> ## Documentation Index
> Fetch the complete documentation index at: https://docs.5x.co/llms.txt
> Use this file to discover all available pages before exploring further.
# Step 7: Invite Your Team
> Add teammates to your workspace and set up basic permissions for collaboration
**Estimated Time:** 5 minutes
Invite your teammates and set up basic permissions to enable collaborative data work on your 5X workspace.
## Why invite your team?
Data projects are most successful when teams can collaborate effectively. By inviting your teammates early, you'll:
* **Enable collaborative data exploration** - Multiple team members can query and analyze data together
* **Share insights faster** - Everyone can access the same data sources and results
* **Establish proper governance** - Set appropriate access levels from the start
* **Accelerate adoption** - More users means faster time to value across your organization
 ## Adding team members
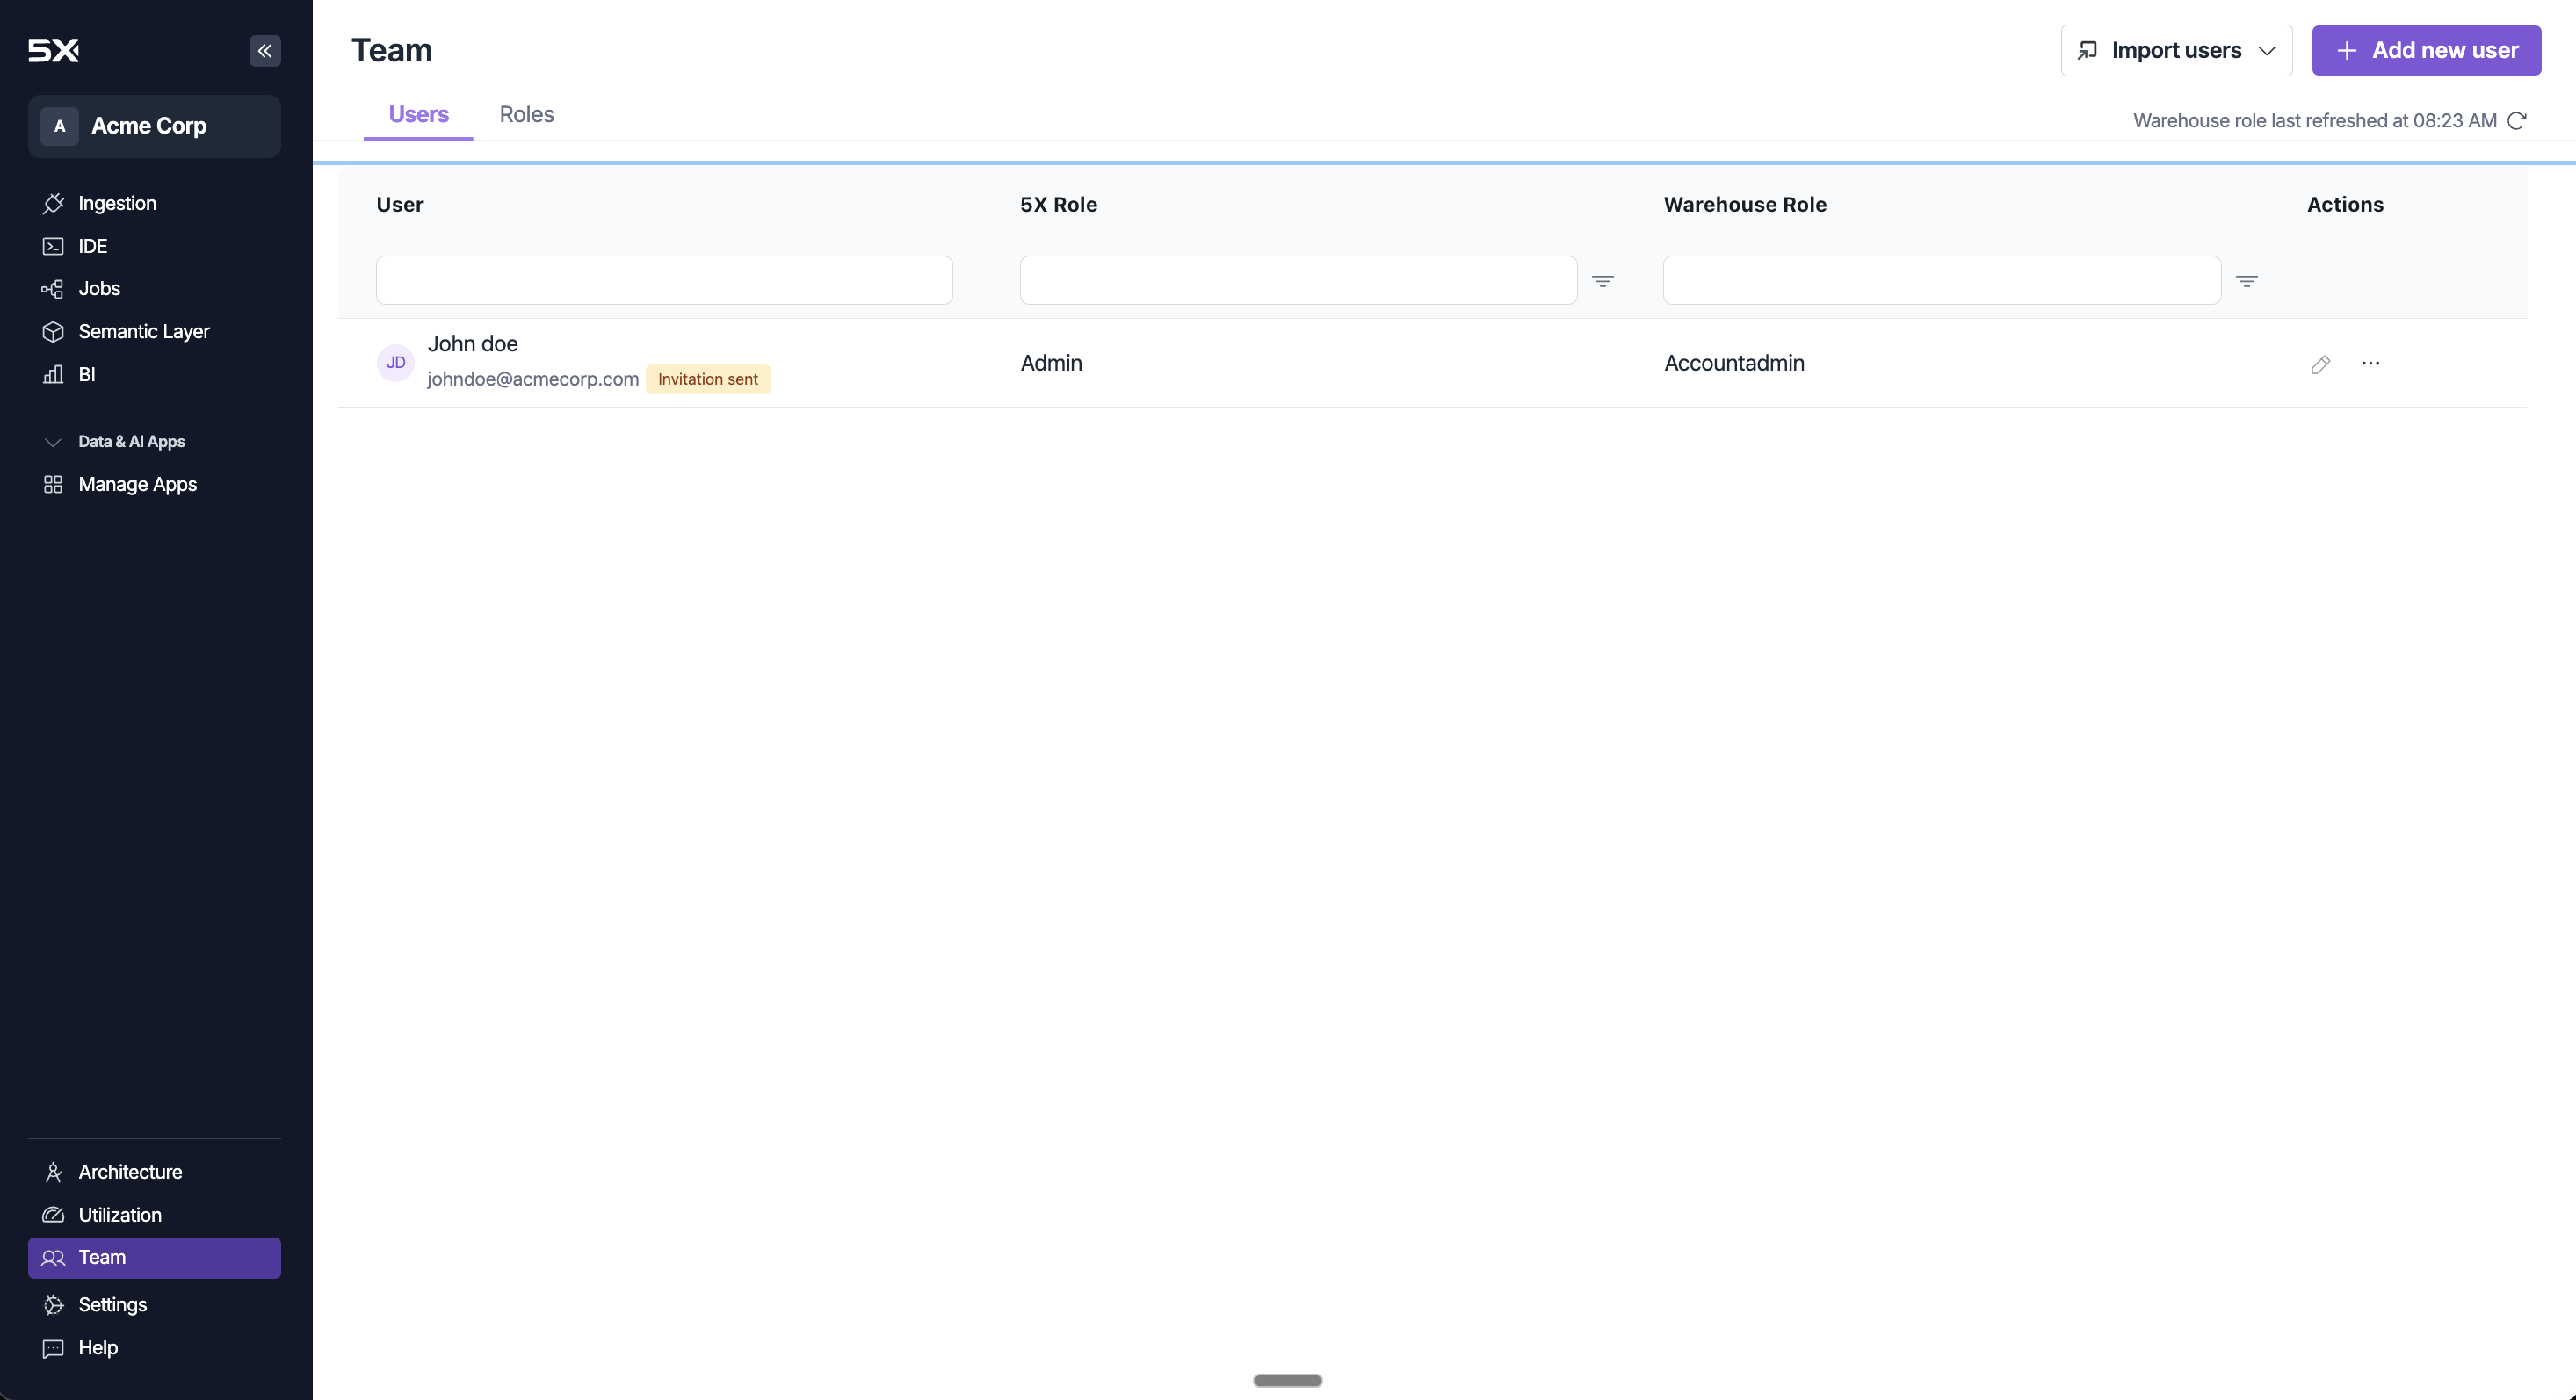
### 1. Access team management
1. **Navigate to Team management section**
* Click **"Team"** in the left sidebar
* You'll see the team management interface with **Users** and **Roles** tabs
2. **Team Management Interface**
* **Users tab**: View current workspace members and their roles
* **Roles tab**: Manage role permissions (if needed)
* See both 5X platform roles and warehouse-specific roles
* Track user status and manage access
### 2. Invite new users
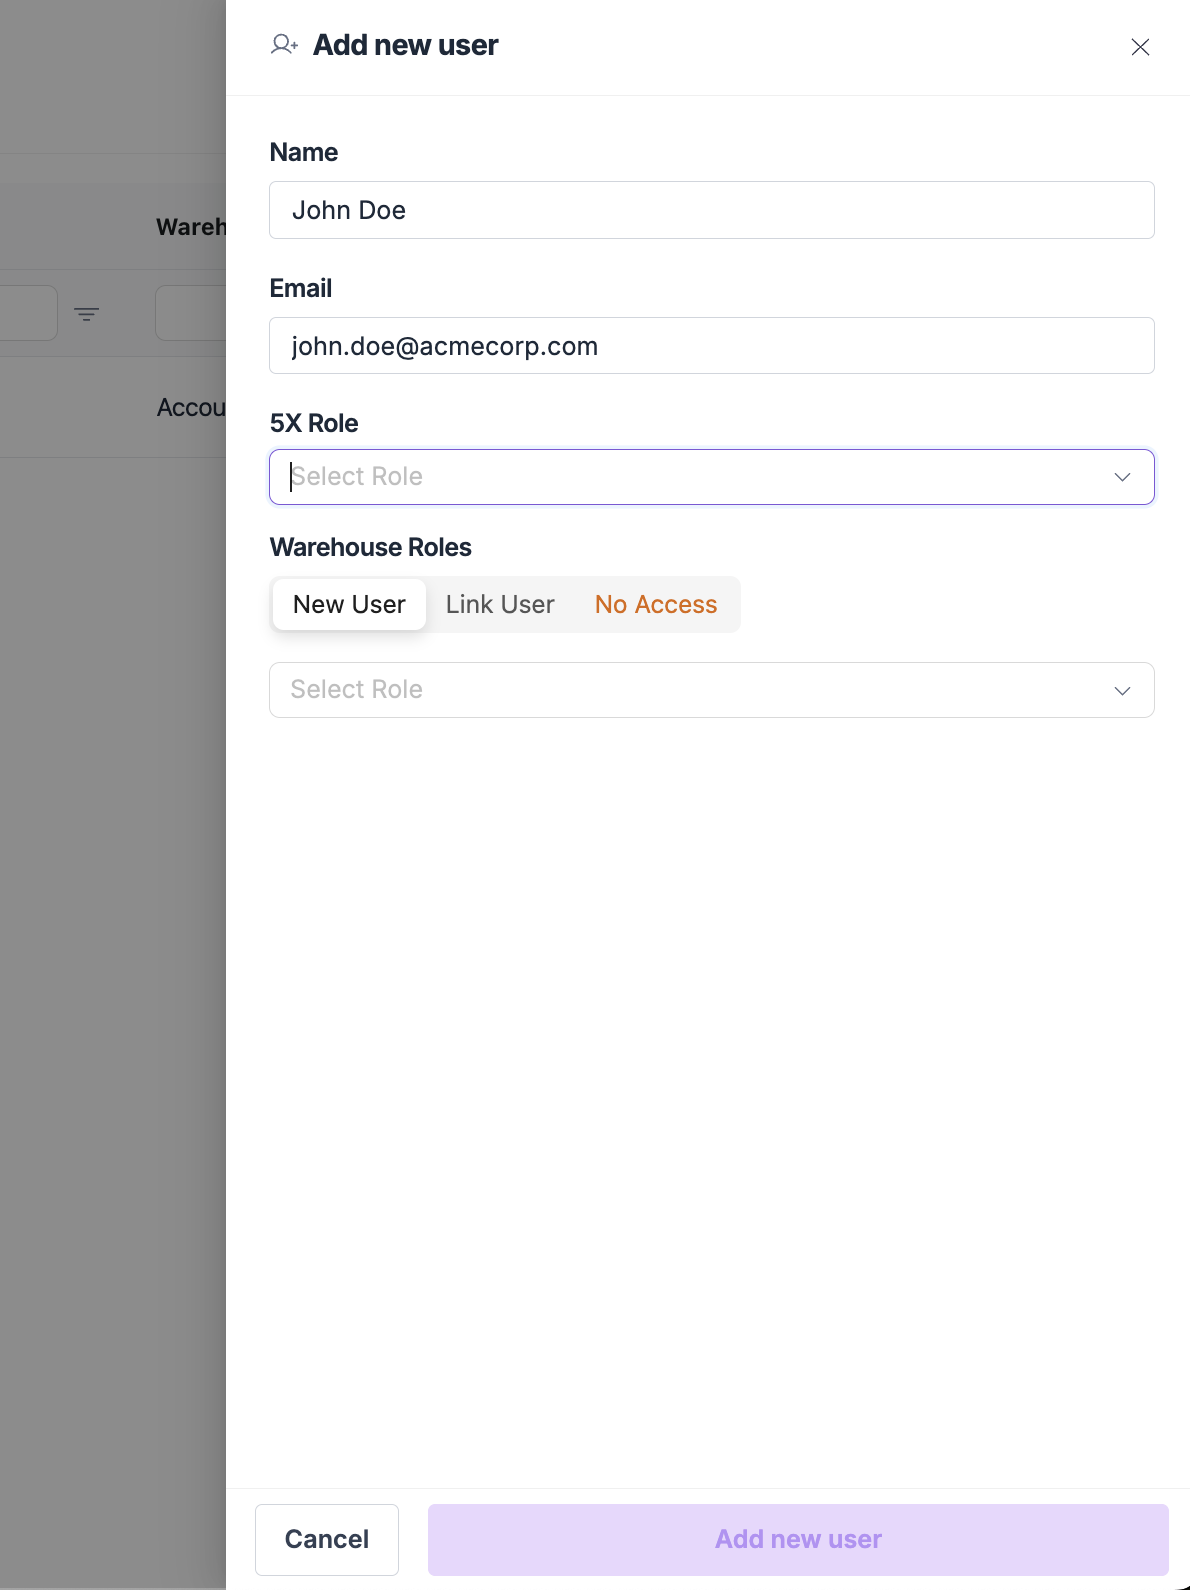
1. **Add Individual Users**
* Click **"Add new user"** button in the top right
* Fill in the user's **Name** and **Email**
* Select their **5X Role** (Admin, Contributor, etc.)
* Choose **Warehouse Roles** based on their data access needs
* Click **"Add new user"** to send the invitation
## Adding team members
### 1. Access team management
1. **Navigate to Team management section**
* Click **"Team"** in the left sidebar
* You'll see the team management interface with **Users** and **Roles** tabs
2. **Team Management Interface**
* **Users tab**: View current workspace members and their roles
* **Roles tab**: Manage role permissions (if needed)
* See both 5X platform roles and warehouse-specific roles
* Track user status and manage access
### 2. Invite new users
1. **Add Individual Users**
* Click **"Add new user"** button in the top right
* Fill in the user's **Name** and **Email**
* Select their **5X Role** (Admin, Contributor, etc.)
* Choose **Warehouse Roles** based on their data access needs
* Click **"Add new user"** to send the invitation
 ## Understanding user roles
The 5X platform uses two types of roles:
**5X Platform Roles** - Control access to platform features:
* **Admin** - Full platform management and user control
* **Developer** - Build models, queries, and data applications
* **Member** - Standard access for data work and collaboration
* **BI User** - Focus on dashboards and business intelligence
* **Custom** - Define specific permission sets
**Warehouse Roles** - Control access to your data warehouse for querying and data operations.
**Keep it simple:** Start with basic role assignments - you can always adjust permissions later as your team's needs evolve.
**Tip:** New users will receive an email invitation to join your workspace. They'll need to accept the invitation to gain access to the platform.
## The invitation process
### What happens when you invite someone
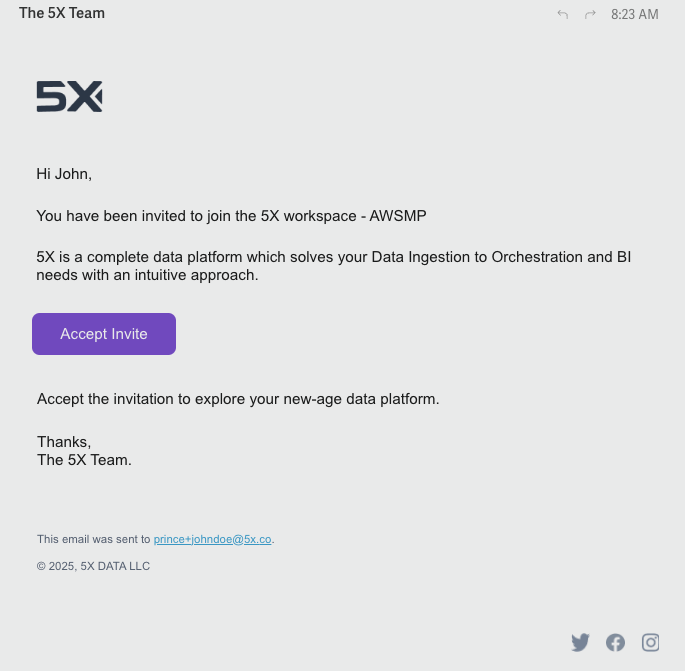
1. **Invitation Email Sent**
* Users receive an invitation email from "The 5X Team"
* Email includes your workspace name and a brief platform description
* Contains an "Accept Invite" button for easy access
2. **User Experience**
* Recipients click "Accept Invite" to join your workspace
* They'll be guided through any necessary account setup
* Once accepted, they'll have access based on the roles you assigned
## Understanding user roles
The 5X platform uses two types of roles:
**5X Platform Roles** - Control access to platform features:
* **Admin** - Full platform management and user control
* **Developer** - Build models, queries, and data applications
* **Member** - Standard access for data work and collaboration
* **BI User** - Focus on dashboards and business intelligence
* **Custom** - Define specific permission sets
**Warehouse Roles** - Control access to your data warehouse for querying and data operations.
**Keep it simple:** Start with basic role assignments - you can always adjust permissions later as your team's needs evolve.
**Tip:** New users will receive an email invitation to join your workspace. They'll need to accept the invitation to gain access to the platform.
## The invitation process
### What happens when you invite someone
1. **Invitation Email Sent**
* Users receive an invitation email from "The 5X Team"
* Email includes your workspace name and a brief platform description
* Contains an "Accept Invite" button for easy access
2. **User Experience**
* Recipients click "Accept Invite" to join your workspace
* They'll be guided through any necessary account setup
* Once accepted, they'll have access based on the roles you assigned
 ## What's next?
Congratulations! You've successfully set up your 5X workspace with data ingestion, exploration capabilities, and team collaboration. Your team now has everything they need to start getting value from the platform.
Learn about advanced features you can explore when ready
Find answers to common questions and get help
## You're ready to go!
Your 5X workspace is now fully operational with:
* ✅ **Data connected and ingesting** from your sources
* ✅ **Team members invited** with appropriate permissions
* ✅ **SQL IDE ready** for data exploration and analysis
* ✅ **Foundation set** for collaborative data work
Your team can now start querying data, sharing insights, and collaborating effectively. The platform will continue to ingest data from your connected sources, keeping everything up to date automatically.
**Optional:** Explore advanced features and capabilities
When you're ready to go deeper, learn about data modeling, dashboards, orchestration, and more.
***
Return to quickstart guide overview
Step 6: Explore your data
## What's next?
Congratulations! You've successfully set up your 5X workspace with data ingestion, exploration capabilities, and team collaboration. Your team now has everything they need to start getting value from the platform.
Learn about advanced features you can explore when ready
Find answers to common questions and get help
## You're ready to go!
Your 5X workspace is now fully operational with:
* ✅ **Data connected and ingesting** from your sources
* ✅ **Team members invited** with appropriate permissions
* ✅ **SQL IDE ready** for data exploration and analysis
* ✅ **Foundation set** for collaborative data work
Your team can now start querying data, sharing insights, and collaborating effectively. The platform will continue to ingest data from your connected sources, keeping everything up to date automatically.
**Optional:** Explore advanced features and capabilities
When you're ready to go deeper, learn about data modeling, dashboards, orchestration, and more.
***
Return to quickstart guide overview
Step 6: Explore your data